


Tips on Creating Digital Collages
While the technique of collage have existed since the invention of paper, the term was originally coined by Georges Braque and Pablo Picasso. This style of creating art from a variety of forms has since become a staple in modern art. With digital image editors like Photoshop and Gimp, artists now have a powerful tools at their disposal to create digital collages. In the following tips, we’ll show how you can set aside the glue and utility knife and create some pixel-based collages.

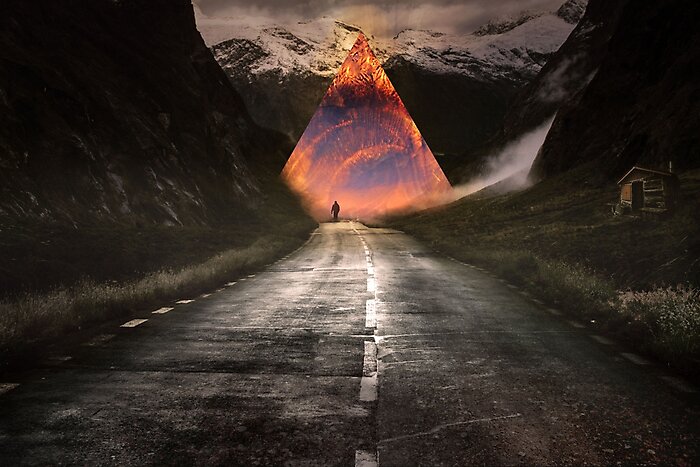
"Out of the Past and Into the Future" by terryr
Step 1: The first thing you want to do is secure some stock photos that’ll be used to make up the various elements of your collage. Taking your own stock photography is a great idea, and you’ll know that that the images you use will be unique to the work you have created. For the purposes of this tutorial, I am using a selection of free stock images from Pexels.com
When sourcing images for your collage, make sure they are high resolution, sharp, and are not heavily edited with effects. Using images that are pixelated, or of low resolution, will be hard to blend in with the other images. Each of the images seen below are of high resolution and share a similar color theme.

Step 2: Start by opening up your base image, in this case it’s the “road with sky” that will be the background. To make it easy, add each image to your work by using File>Place Embedded. This way the new images will be added to your document as smart objects, if you are using Photoshop that is. Ideally, you should only scale images down in your document, and by using smart objects you have the flexibility to change sizes of the layers up or down if needed. It also makes it easier to add and remove effects when using smart objects. Always work non-destructively.
In the video below an image of some mountains is placed at the top of the document. When placing, and resizing images, it makes it easier if you lower the opacity of the layer you are trying to align. The mountains are now lined up with the horizon line of the background. Using a layer mask and a soft-edged brush, the bottom portion of the mountain layer can be painted away. This way the two images blend seamlessly.
Step 3: Continue adding new layers and using masks to blend the elements together. If your layers are of different hues and tones, you can use image adjustments such as exposure, curves, color balance, channels mixer, and more to get the images to blend seamlessly.
Another trick, is to use gradient maps and layer effects to color tone the image. In the video below, a black and white gradient map is added to darken the top portion of the image, and a color overlay effects is used to give the image a new color tone. The tiny house now feels less like it was simply pasted in.
Step 4: In the video below, some dirt was added to make the road a bit more worn looking. The source image was taken in the daylight and was very bright. Since the layer is a smart object, the exposure image adjustment was used to darken the layer. The layer was then further adjusted using blending modes and lowering the “fill adjustment” just a touch. The dirt now looks like it belongs there.
Step 5: As this is a digital collage, layers can be filled with images, shapes, painted brush marks, and more. Add each layer with the goal of creating your scene, but so that each element contributes. One of the many perks of creating digital collages, is that every element you add can easily be removed.
The final layers of the document, are mainly layer adjustments, and a couple layers fill with white brush marks that have been blurred using “Gaussian Blur”. This adds a small fog effect, and using blending modes on this layer you can create some subtle lighting effects.

Finish: At this point it’s often a good idea to take a break from your design, even give it a day or so to sit. Once you visit it again you can look at it with a fresh pair of eyes, see if anything needs to be adjusted, added, or removed. If you are happy with the work, save your master PSD file and export to be added to products.
Did you find the tutorial helpful? Please let us know in the comments below, and share any tips you might have.


